Creating Garages
Garages are the facilities where vehicles pull out of when starting a run and pull in to when completing a run.
Before you begin
Procedure
-
Click the Add New button:

The Detail tab appears. - Type an Abbrev. (abbreviation) for the garage.
- Type a Name for the garage.
- Optional:
Type the Capacity code of the garage.
Capacity codes for this field are determined by each individual site and represent the capacity of a garage to hold vehicles.
Leave this field blank if your site has not defined capacity codes.
- Optional:
Choose a geocode color for the garage:
When you highlight the garage on the map, the geocoded point marking the garage is displayed in the selected color.
-
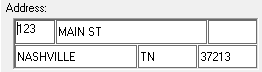
Type the address of the garage in the appropriate address fields.
- Geocode the address.
- Type the Phone number of the garage.
- Type any Notes or comments about the garage.
- Optional: To make the garage inactive, select the InActive check box.
- Click the Save button:
