Defining Job Data for Schedule Jobs
Specify how you want the schedule job to be performed by creating job data.
Before you begin
About this task
If there are multiple sets of job data (that is, there are many steps to a scheduled job), they are executed sequentially starting from the first one in the list to the last one in the list.
Procedure
- Select a job schedule in the grid.
- Click Edit.
-
Confirm an Agent Name is defined for the job
schedule.
The selected agent determines the options that are available in the Job Type field.
-
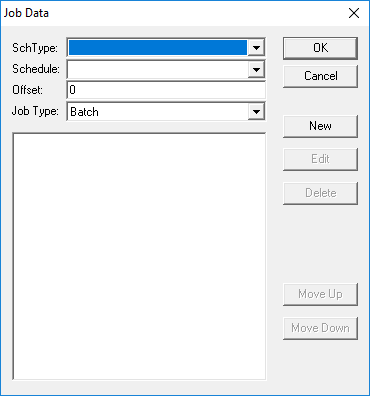
Click Job Data.
The Job Data dialog box appears.
-
In the SchType field, click a schedule:
Live or Template.
- Optional: In the Schedule list, if setting parameters for a single date or week day, specify a date or day. If the job parameters should apply to all dates or days that the job runs, leave this field blank.
-
In the Offset field, type the offset
from the present date.
Typing 0 will run the job today. Typing 1 runs the job on the next day’s schedule.
Using Offset allows you to always run the job for days in the future.
- In the Job Type field, select a job type.
- Click New.
- Define the settings for the new batch job.
-
Click OK.
Each set of job data you enter is a complete and independent job.
- Create any additional jobs for this job type.
- Optional:
In the Job Data dialog box, click Move Up and
Move Down to arrange the batch jobs in the desired
sequence.
The Schedule Server runs the jobs in the defined sequence from top to bottom.
-
Click OK.
The Job Data dialog box closes.
- Adjust any job schedule information.
- Click Save.