Setting the OPS Roster Management Context
Setting the screen Context (F3) shows and filters data related to your task.
-
In the OPS Roster Management screen, open the Context
(F3).
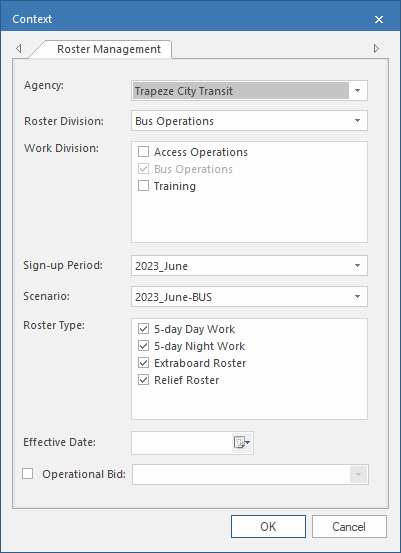
- Select the Agency for which to manage rosters.
- Select the Roster Division to which the roster belongs.
-
Select the Work Division to which the work in the roster
belongs. You must also select the roster division in this list.
If the property isn't selected, the list of work divisions appears shaded. Select the property if you want to select other divisions.
- Select the Sign-up Period when the rosters will be used.
- Select the Scenario for the rosters.
-
Select the Roster Type you will be creating.
You can choose multiple types.
-
Select an Effective Date.
The rosters will be valid as of this date.
-
Select Operational Bid and then the operational bid for
which you are creating rosters.
The validity period of the rosters will be set to the period of the selected operational bid. If you don't select Operational Bid, the validity period is set to the sign-up period.