Creating Buffered Polygons
You can create polygons based on a specified radius, or buffer, that surrounds selected lines and services.
Before you begin
About this task
Procedure
-
Click .
The Extended FX Data Tool dialog box appears.
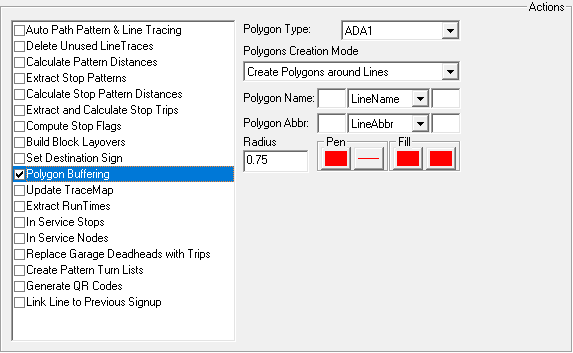
- Select the Polygon Buffering check box.
- Click the Polygon Type.
- In the Polygon Creation Mode list, click how the polygons should be created.
-
In the Polygon Name field, type the prefix and suffix (if any)
and select the value type to be used to name the new polygons.
For example, if the prefix PL1 and suffix -1 are added to LineName values, a polygon called PLBELMONT-1 will be created for a line called BELMONT and a polygon PLCHARLOTTE-1 will be created for a lined called CHARLOTTE.
- In the Polygon Abbr. field, type the prefix and suffix (if any) and select the value type to be used for polygon abbreviations.
- Type the Radius value to use for the buffer around the line or pattern that will define the polygon.
- In the Pen and Fill boxes, select the pattern and color to fill the area within the polygon.
- Click Execute.
- Click Close.