Creating Polygons
Polygons and polygon boundaries help develop service routes as well as determine client mobility within the service area.
Before you begin
Procedure
- Click .
- In the list, click a polygon type for the new polygon.
-
Click the Add New button.

The Polygon Properties dialog box appears.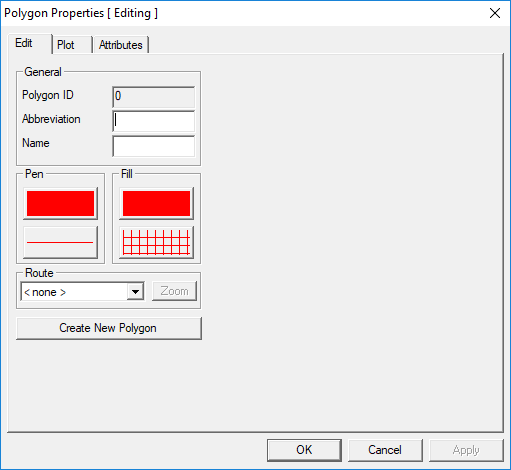
-
Click Create New Polygon.
In the title bar, [ Editing ] becomes [ Adding ].
- In the General frame, type the polygon Abbreviation and Name.
-
Choose the polygon outline color:
-
Click the color bar in the Pen frame.
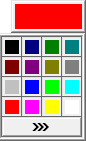
- To look at other color choices, click the triple arrow button below the color palette. The Colordialog box appears.
- Click the color to be the outline color of the polygon.
- From the Basic colors or Custom colors palette, click the color you want.
- Optional: To add a custom color, click on the range of colors on the right section of the dialog box until you get the right mix of colors as shown in the Color|Solid box. Click Apply to add the color to the Custom Colors palette.
- Click OK to exit the Color dialog box.
-
Click the color bar in the Pen frame.
- Optional:
Choose the width of the polygon outline:
-
Click the line style box.
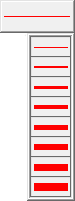
- Click the desired line width.
-
Click the line style box.
- Optional:
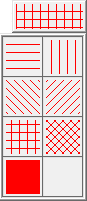
Choose the color to fill in the polygon:
- Click the color bar in the Fill frame
-
Select a color.

-
To choose a pattern to fill the area within the polygon, click the pattern style box
and then click the desired pattern in the list, which shows various patterns.
- If the polygon is assigned to a route, click the route in the Route list.
- Optional:
To get a closer look at the route on the map, click the Zoom
button.
Routes are typically defined for Fixed Route or Flex systems.
-
Click Apply.
The system generates the polygon ID and the settings you have chosen on the appearance of the new polygon are saved.
- Click OK.