Activating Live Trips Using the Select Activation Range Dialog Box
New subscriptions created to start on a live schedule that is already loaded are NOT automatically activated.
Before you begin
About this task
Procedure
- In the Client field, search for and select the client whose booking(s) you want to view.
- Select the Sub check box.
-
Click Display.
All subscription trips (master records) for the client are shown in the grid.
-
Highlight the appropriate master records.
To highlight all records, click the click the leftmost cell in the grid heading row.
-
Hold the CTRL key while right-clicking and choosing
Activate.
The Select Activation Range dialog box appears.
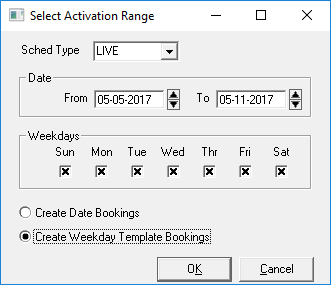
- Select the Create Date Bookings option.
- In the Sched Type list, select Live.
-
Ensure that the appropriate days are selected in the Weekdays
check boxes.
To prevent errors from occurring, make a habit of selecting every week day, including the days that are not part of your subscription. The system only creates templates for days specified by the subscription.
-
Click OK.
The dialog box closes.
- Click Display.