Configuring and Applying Created Pull-Outs and Pull-Ins
Created pull-outs and pull-ins are types of relief points assigned to blocks. They help get operators to their assigned routes or from their routes to the garage and allow the breaking up of long blocks.
- Set the Use Created Pullouts and Pullins property to Yes, which is a user-defined property on the Relief/Breaks tab in the Properties dialog.
- Apply the label “P” (Created Pull-out and Pull-in) to the node/stop that is associated
with the Created Pull-out and Pull-in. Note: Do not add a "R"( Relief) label to the nodes you have selected for created pull-outs and pull-ins.
- Complete the trip building and blocking processes for the trips and blocks that include the selected node/stop.
Open the Runs screen.
-
Select the scenario that you will use.
The current context must have the default run exception combination set in order to apply created pull-outs and pull-ins.
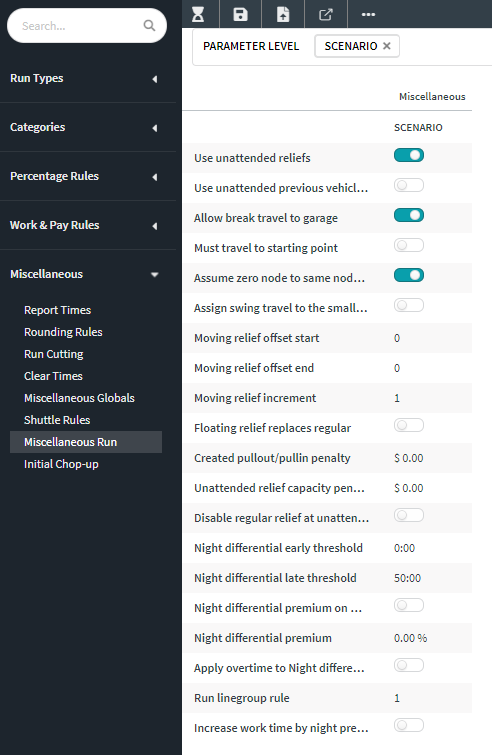
- Before performing the runcut, open the Parameters screen.
-
On the left pane, click and set the Created pullout/pullin penalty parameter,
if required. :
- Perform the runcut.
-
After the runcut, on the screen toolbar, click the Apply Created
Pullouts/Pullins button:
 The Apply Created Pullouts/Pullins dialog appears.
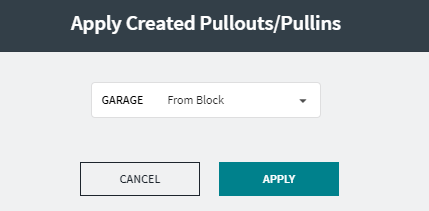
-
Choose the appropriate option from the Garage drop-down list:
- To have the pull-out and pull-in at the same garage, select From Block.
- To set the pull-in at a different garage, select the garage you want.
-
Click Apply.
A message appears confirming that the created pull-outs and pull-ins were successfully applied to a specific number of blocks. If the system was unable to complete the action, a message appears advising you that there were no blocks to which created pull-outs and pull-ins could be applied.
- Click OK.
If no created pull-outs and pull-ins were applied, check that the Use Created Pullouts and Pullins property was activated in Trapeze FX or that the nodes were designated for Created pull-outs and pull-ins.