Saving Scenarios
When you cut or uncut a run or make a change to a parameter and change the context or sign-up period in BlockBuster Web, you are prompted to save the scenario. You can save as many scenarios as you want for comparison later.
You must be granted the permission to be able to perform this task.
When you make changes to a previously saved scenario, you need to save the modified scenario as a new scenario, that is, give it a different name.
Give the scenario a unique and meaningful name so that you can remember it and use or build on it later.
-
On the Runs screen toolbar, click the Save
Scenario button:
 The Save Scenario dialog appears.
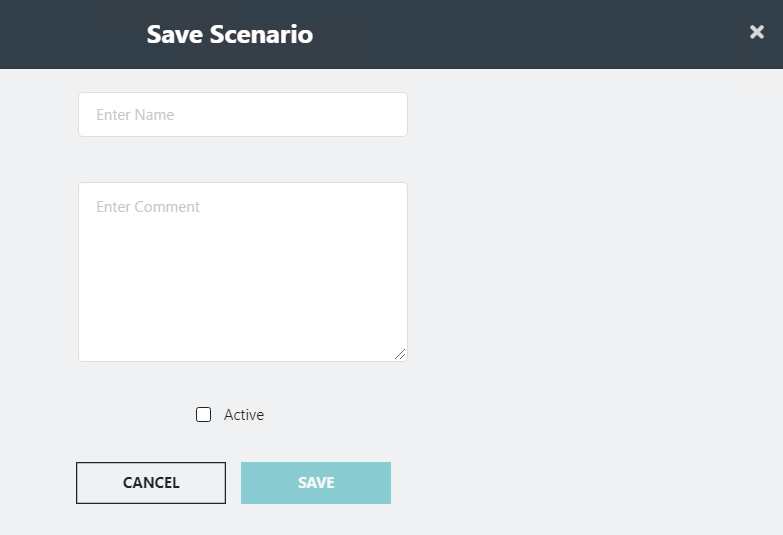
- Required:
In the Enter Name field, type a name for the scenario.
Make sure to enter a name that has not been previously used.
If you entered a name that has been previously used, a message appears stating that the name already exists. Enter a different name.
- In the Enter Comment field, type a short description of the scenario or information about the scenario for future reference.
- Optional: Select the Active check box to finalize the runs that can be exported to other products.
-
Click Save.
Note: After clicking Save, the saved scenario is shown as the active scenario in the Scenario field.