Workspaces contain menu options and commands that allow you to perform tasks based on
your security permissions.
Workspaces are sometimes called workstations or screens. They can be configured so that many
users see the same options when they log into the Client Shell.
In this guide, screen is used when referring to features within Trapeze OPS.
For example, the Daily Activity screen or the Bidding
screen.
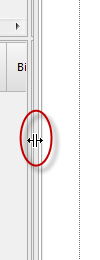
If a screen has views shown in panes, you can change pane sizes by hovering your mouse over any
border until a double-headed arrow appears. Press and drag until the pane is the desired
size.
To change the size of text in a specific pane, hover over the pane and then press and hold the
CTRL key while using the scroll button on your mouse.
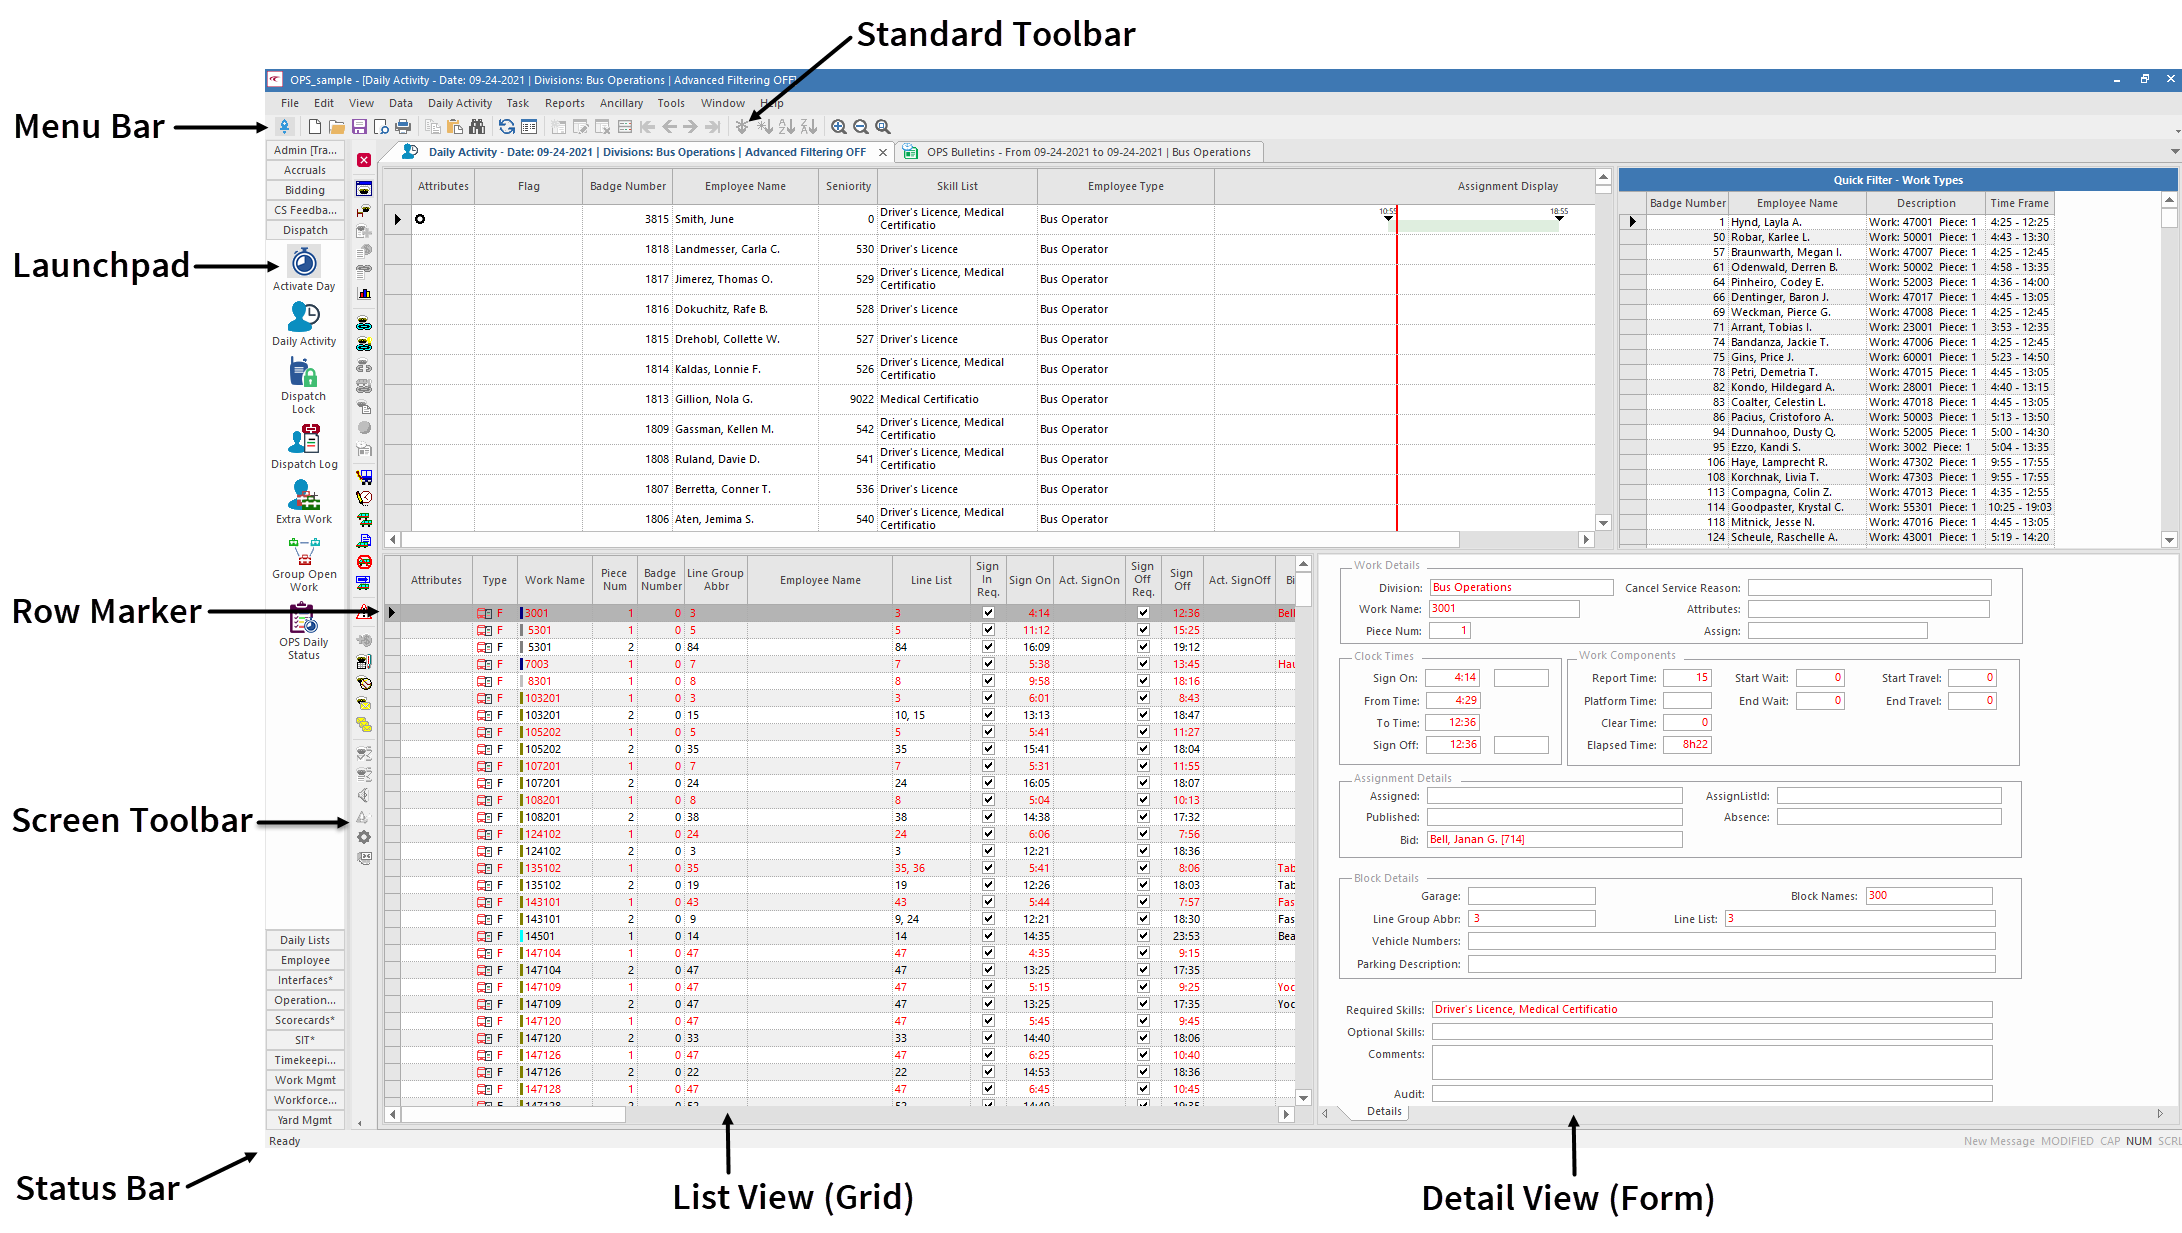
Table 1. Explanation of Workspace Sections
Section
Description
Menu bar
Offers the following options for opening screens and accessing functionality:
File
Edit
View
Data
Task
Reports
Ancillary
Tools
Window
Help
When you open a screen, a menu for the screen also appears in the menu bar.
Standard toolbar
Offers functions commonly used in system screens. For example, Add
New, Edit, and Delete.
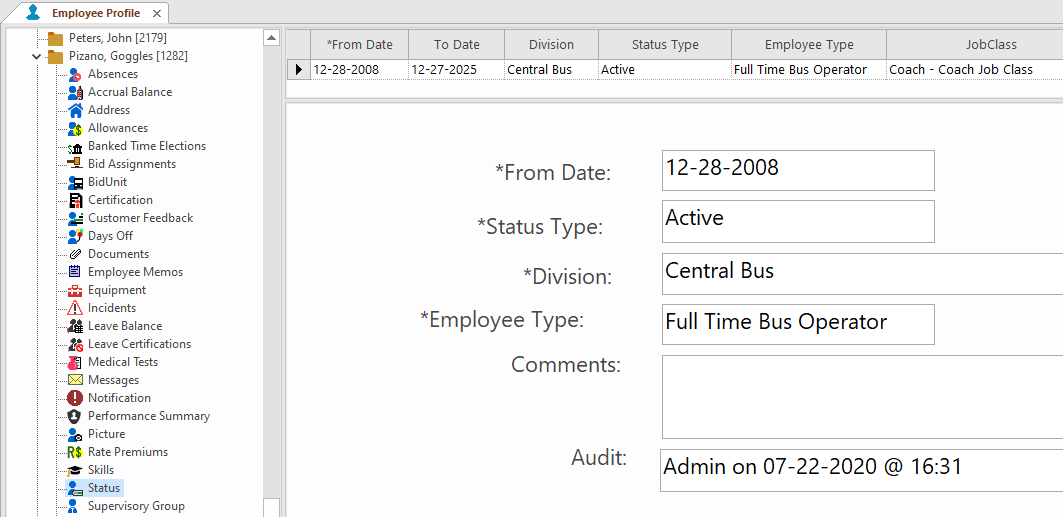
Screen toolbar
Offers functions specific to the active screen. For example, in the Employee
Profile screen, Change PIN.
Active screen
Open screen currently in use.
Scroll bars
Thin horizontal and vertical navigation bars.
List view
Shows information in a spreadsheet layout, with rows of individual records and columns
of additional field information.
Also called grid view.
Detail view
Shows fields of detailed information about a record selected in list view.
Also
called form view.
Tabs
Indicates other screens open in the workspace. Select a tab to view it.
Some screens
may also have their own set of tabs at the bottom of the screen.
Row markers
Found in list (grid) view. Row markers can have right-click menus with options
different than those available in the main grid.
Status bar
Indicates when a screen is ready for use.
Launchpad
Shows command buttons for easy access to related workspace screens.
Table 2. Standard Toolbar Description
Button
Label
Description
Launchpad
Opens the Launchpad, which shows buttons for opening screens in the workspace.
New
Opens new reports. To open existing reports, use the Reports menu.
Open
Opens files such as reports.
Save
Saves data changes in the screen.
Print
Prints the grid selection.
Print Preview
Shows a preview of how the printed information should appear.
Cut
Cuts the selected text.
Copy
Copies the selected text. Only visible columns are copied. Headers can also be
copied.
Paste
Pastes a previously cut or copied selection.
Find
Finds the specified text.
Refresh
Updates data in the screen.
Context
Opens the Context dialog where you can specify the data to show in the screen. You can
also press F3.
Add New
Adds a new record.
Edit
Allows you to edit the selected record.
Delete
Deletes the selected record.
Customize Grid
Opens the Customize dialog where you can hide and show fields and
change screen formatting.
First
Goes to the first record in the list.
Last
Goes to the last record in the list.
Sort
Shows the current data sort order and allows you to sort data by values in multiple
columns.
Sort Ascending
Sorts data records in ascending order by values in the selected column.
Sort Descending
Sorts data records in descending order by values in the selected column.
No sort
Restores the system default sort order for data in the grid.
List
Shows a list (grid) view of available records.
Detail
Shows detailed information about a record selected in the screen.
Zoom In
Increases the print size.
Zoom Out
Decreases the print size.
Zoom 100%
Restores the screen to the default print size.
Table 3. Keyboard Shortcuts
Shortcut
Description
F2
Go to the next bookmark.
F3
Show the Context dialog for the active screen.
F5
Refresh an active screen.
F6
Go to the next pane in the data screen.
ALT+F
Open the File menu.
ALT+T
Open the Task menu.
ALT+E
Open the Edit menu.
ALT+V
Open the View menu.
ALT+D
Open the Data menu.
ALT+R
Open the Reports menu.
ALT+A
Open the Ancillary menu.
ALT+O
Open the Tools menu.
ALT+W
Open the Window menu.
CTRL+N
Open a report.
SHIFT+F2
Go to the previous bookmark.
CTRL+F2
Toggle between two bookmarks.
CTRL+F4
Close the current screen.
CTRL+F6
Go to the next screen open in your workspace.
CTRL+SHIFT+F6
Go to the previous screen open in your workspace.
CTRL+O
Launch the Open dialog to access files on your hard drive and network.
CTRL+L
Toggle list view on and off.
CTRL+D
Toggle detail view on and off.
SHIFT+F6
Go the previous pane in the data screen.
<-- and -->
Scroll left and right through fields in a detail view using the left arrow and right
arrow keys on your keyboard.
CTRL+X
Cut text.
CTRL+C
Copy text.
CTRL+V
Paste text.
CTRL+F
Find text in the column where your cursor is placed.
CTRL+H
Find and replace text in the column where your pointer is located.
ALT+D, A
Add a new record in the screen.
CTRL+S
Save current record or file.
ALT+W+E
Clone current screen.
CTRL+P
Print current screen.
ESC
Cancels the operation, dialog input, grid data input, or data fetching.