Creating Vehicle
Vehicles contain relevant information for agency vehicles, which applies to runs.
Before you begin
Procedure
-
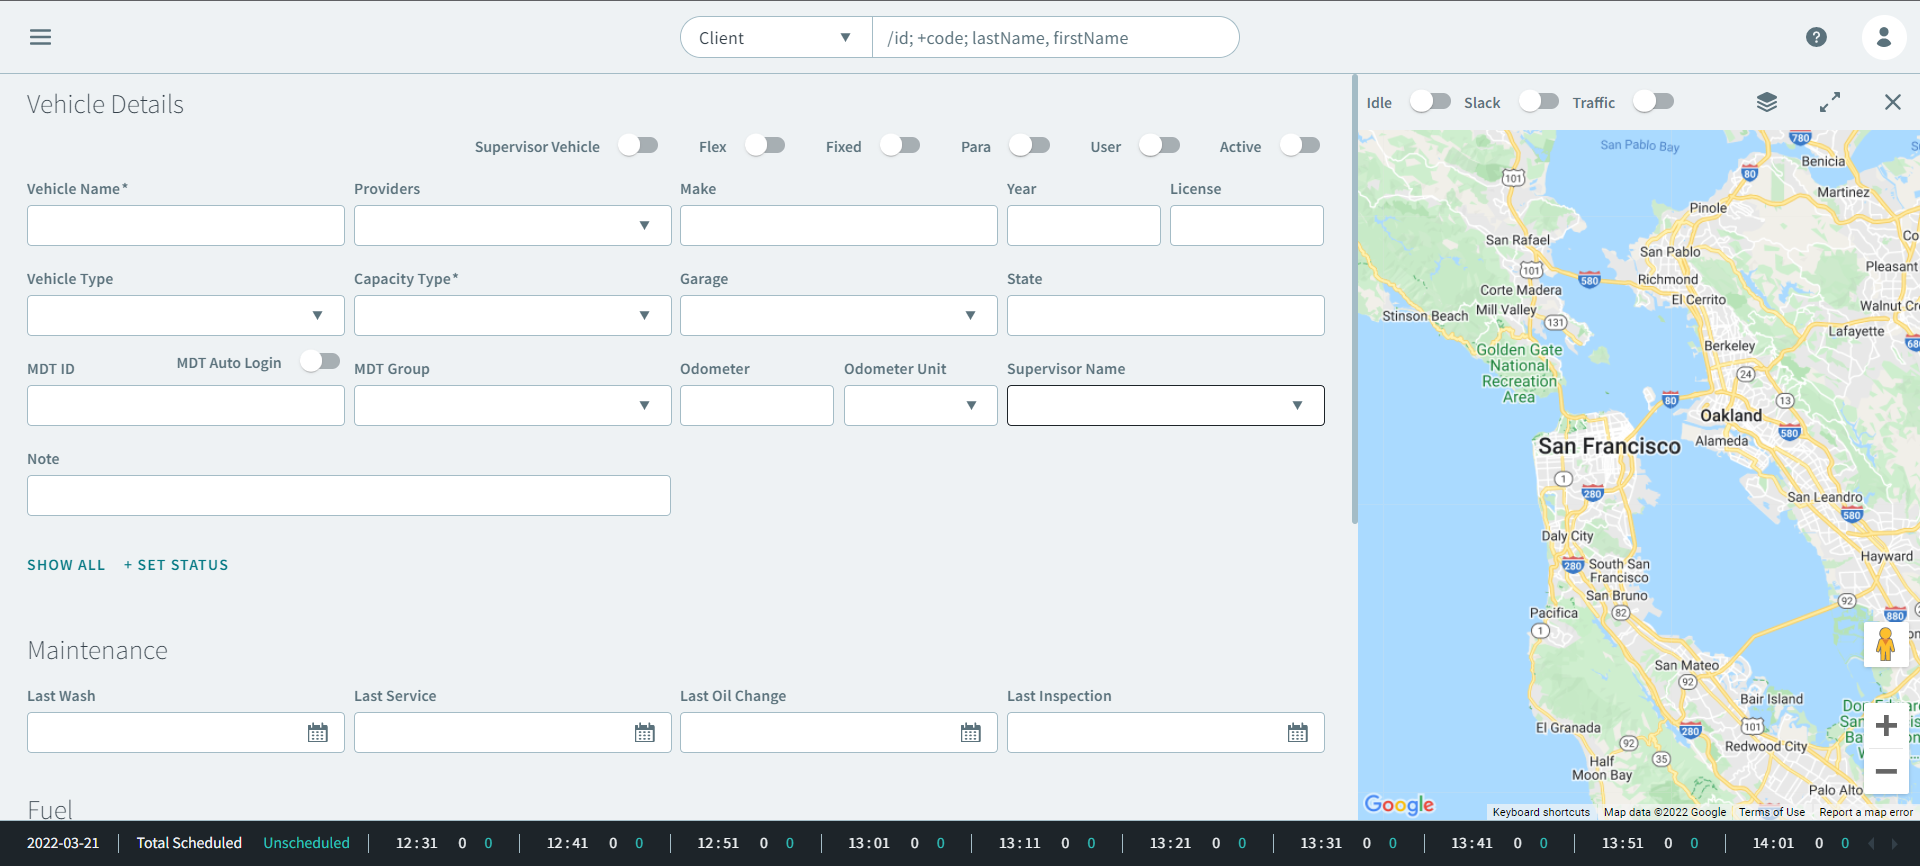
Click +Add Vehicle.
The Vehicle Details page opens.
-
In the Vehicle Details section, complete the following
fields:
- Toggle one of the following ON.
- Enter vehicle information in the following fields:
- In the Vehicle Name box, enter a name.
- In the Capacity Type list, select a type.
- In the Provider(s) list, select a provider.
- In the Make box, enter the make of the vehicle.
- In the Year box, enter the year the vehicle was made.
- In the License box, enter the license number.
- In the Vehicle Type list, select a type.
- In the Garage(s) list, select a garage.
- In the State box, enter a state.
- Toggle MDT Auto Login ON.
- In the MDT ID box, enter an ID.
- In the MDT Group list, select a group.
- In the Odometer box, enter the last-inputted odometer reading of the vehicle.
- In the Odometer unit list, select a unit.
- In the Supervisor Name list, select a name.
- In the Note box, enter any relevant information.
-
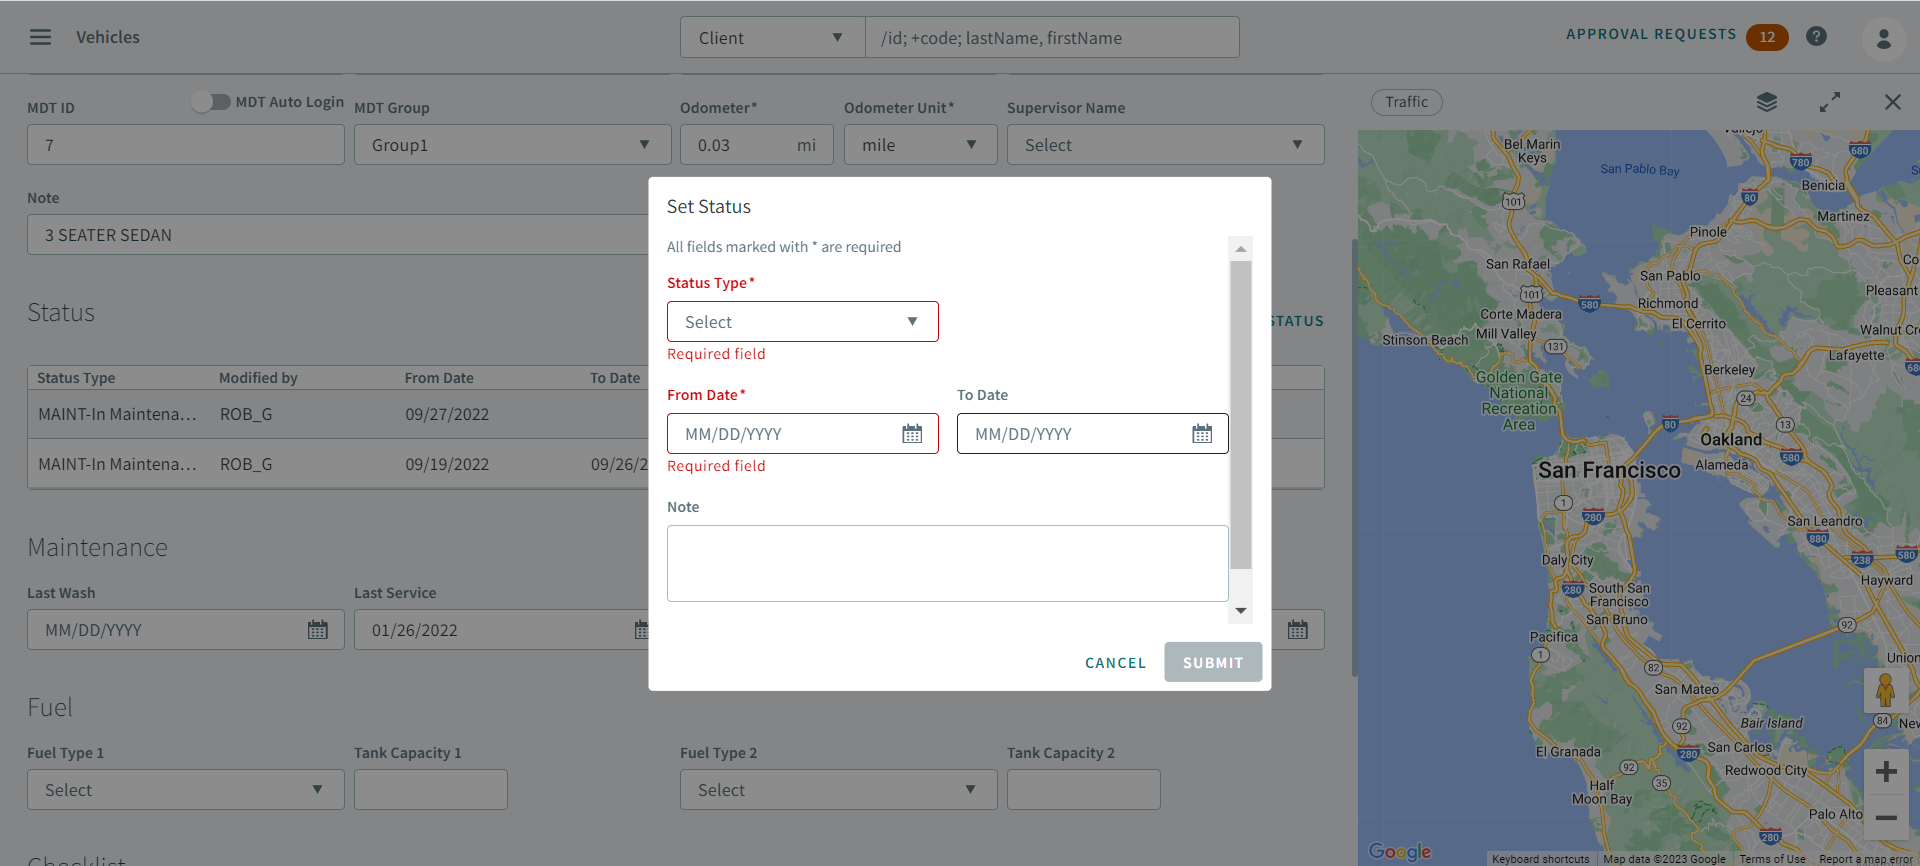
Click +Set Status.
Set Status opens.
-
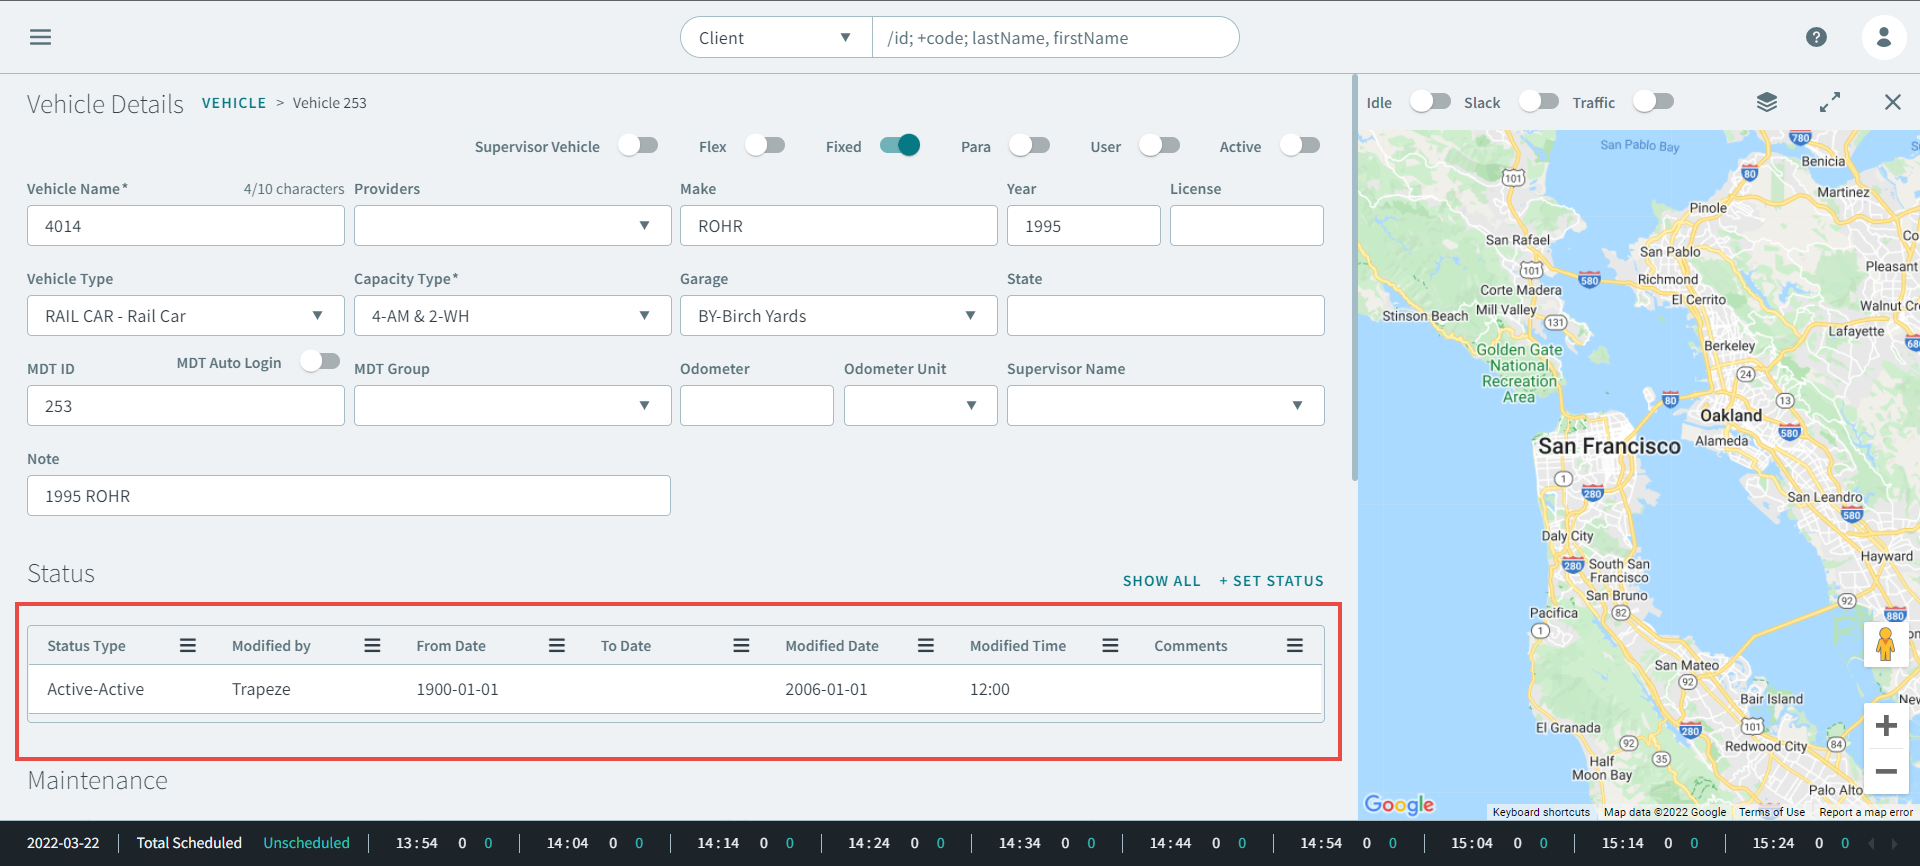
Click Submit.
Status of vehicle appears.
-
Click Submit.
-
In the Maintenance section, enter information in the
following fields:
Tip:When entering a date, use the format yyyy/mm/dd.
- In the Last Wash box, enter a date, or select a date from the calendar.
- In the Last Service box, enter a date, or select a date from the calendar.
- In the Last Oil Change box, enter a date, or select a date from the calendar.
- In the Last Inspection box, enter a date, or select a date from the calendar.
-
In the Fuel section, enter information in the following
fields:
- In the Fuel Type list, select a type.
- In the Tank Capacity box, enter a number.
-
In the Checklist section, enter information in the
following fields:
- In Pre-Checklist, select an option.
- In Post-Checklist, select an option.
- In Supervisor-Checklist, select an option.
- In the Contact section, enter a phone number in the Mobile box.
- Click Save.