Recording Extra Pay
If normal work pay time needs to be increased, extra pay can be recorded.
- Open the Daily Activity screen and set the Context (F3).
- Select the piece of work for which to record extra pay.
-
Select Extra Pay:

-
Select the Extra Pay Type.
The Job Class field is automatically filled if a default Job Class was entered in the Extra Pay Types ancillary data screen.
-
Enter the time the extra pay begins and ends in the From
Time and To Time fields.
Depending on the extra pay type, these fields may have default values entered.The Pay Time field fills in with the difference of the From and To times. If required, you can manually update this value. For example, your agency may have a rule to round up or round down extra time.
-
Select an Approval Status.
An approval status is only required for extra pay types that are defined as requiring approval. Other pay types will default to Not Applicable as their Approval Status.
To edit Extra Pay approvals in the Daily Activity screen (the approval status and supervisor comments), the security key must be granted.
- If required, select an Extra Pay Reason.
-
Enter any Supervisor Comments.
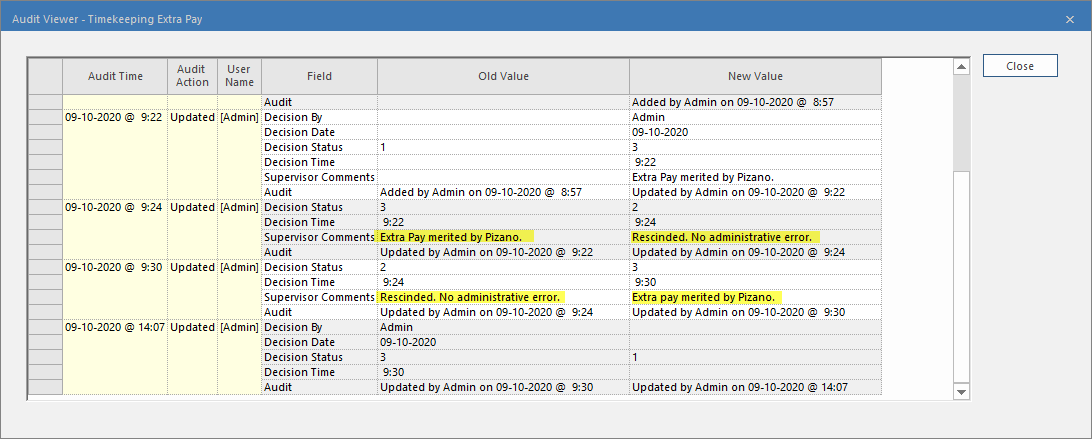
Supervisor comments can be added here, or in the Extra Pay Management screen. To see a history of supervisor comments for an extra pay record, in Extra Pay Management, use the Audit Viewer.
-
Select the next blank line to save the record.
Approval Info, if applicable, is automatically updated.
-
If the Assignment Violations dialog lists work assignment
rule violations, select OK.
A yellow symbol indicates a warning and the extra pay can be added. A red symbol indicates an error and the extra pay can only be added if you create a waiver. If the Create Waivers dialog appears, select OK to add the extra pay despite the rule violations.
-
If applicable, select Cost Allocation:

- Select OK.