Creating On-Demand Bookings
On-Demand bookings allow you to create one-off trips for a single day. These trips do not follow a regularly scheduled pick up and drop off.
Before you begin
Procedure
-
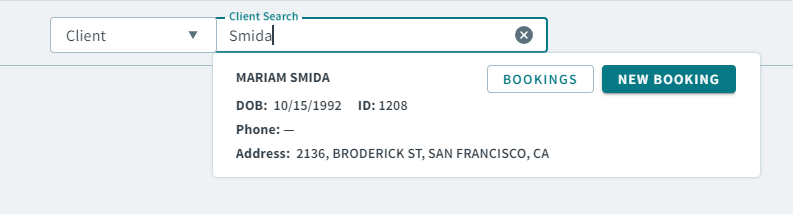
In the Global Search Box, and with
Client selected in the dropdown list, type the client
name or ID number.
Note:If you are searching for a client by ID number, type / before the number. For example, /145.The client's information displays in the dropdown list.
-
Click New Booking in the client's information.
A new booking opens.
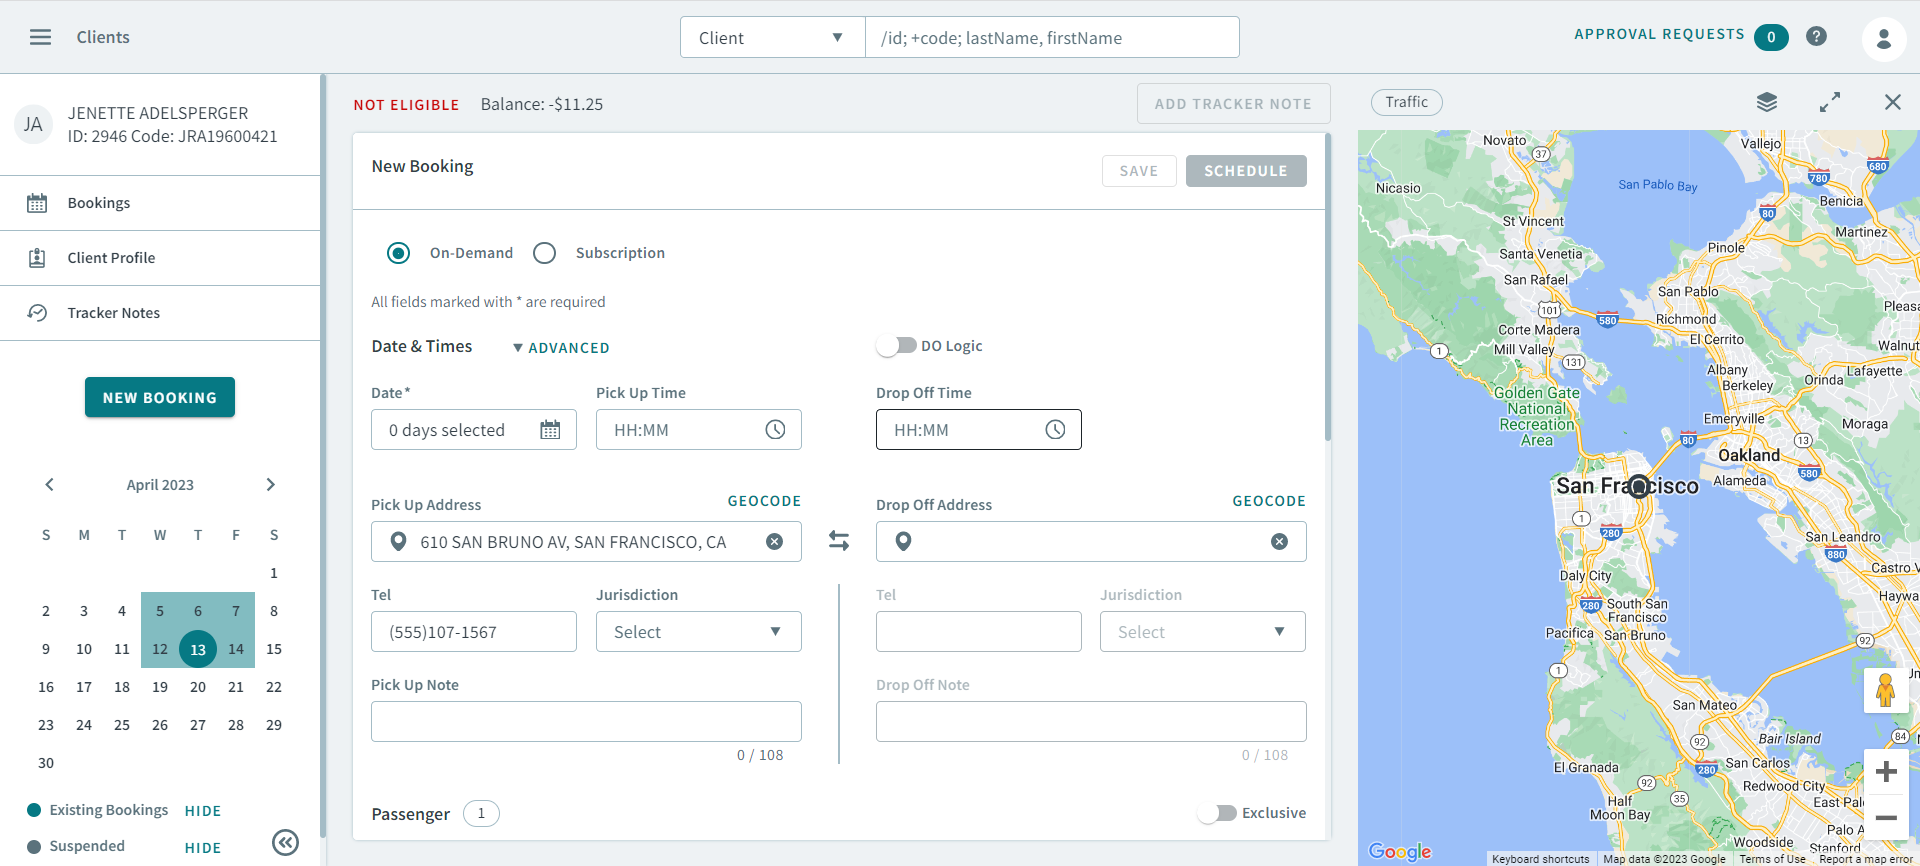 Note:The On-Demand option is selected by default.
 - Optional:
If required by your transit site policy, turn the
DO Logic toggle on.
Remember:Depends On Logic rules must be set up beforehand in Trapeze4 for DO Logic to work.
-
In the Date field, click
 calendar icon, and select the dates for the
booking.
Tip:If you have a client who wants to book more than one trip (the same pick-up and drop-off, and the same time details), but do not occur at regular intervals, you can select more than one day from the calendar.
calendar icon, and select the dates for the
booking.
Tip:If you have a client who wants to book more than one trip (the same pick-up and drop-off, and the same time details), but do not occur at regular intervals, you can select more than one day from the calendar.This is an easy way to duplicate a booking for future trips so that you do not have to create a new booking each time.
The number of days selected appears in the Date field. -
Set the requested time for Pick Up Time or
Drop Off Time.
Notice:You can only set a time in either the Pick Up Time, or Drop Off Time text box, not both at once.
To add additional time information for pick-up and drop-off times, you must use the Advanced Date and Time fields . Click Advanced to expand more Date and Time fields. Skip to Step 7 for how to configure the additional time fields.
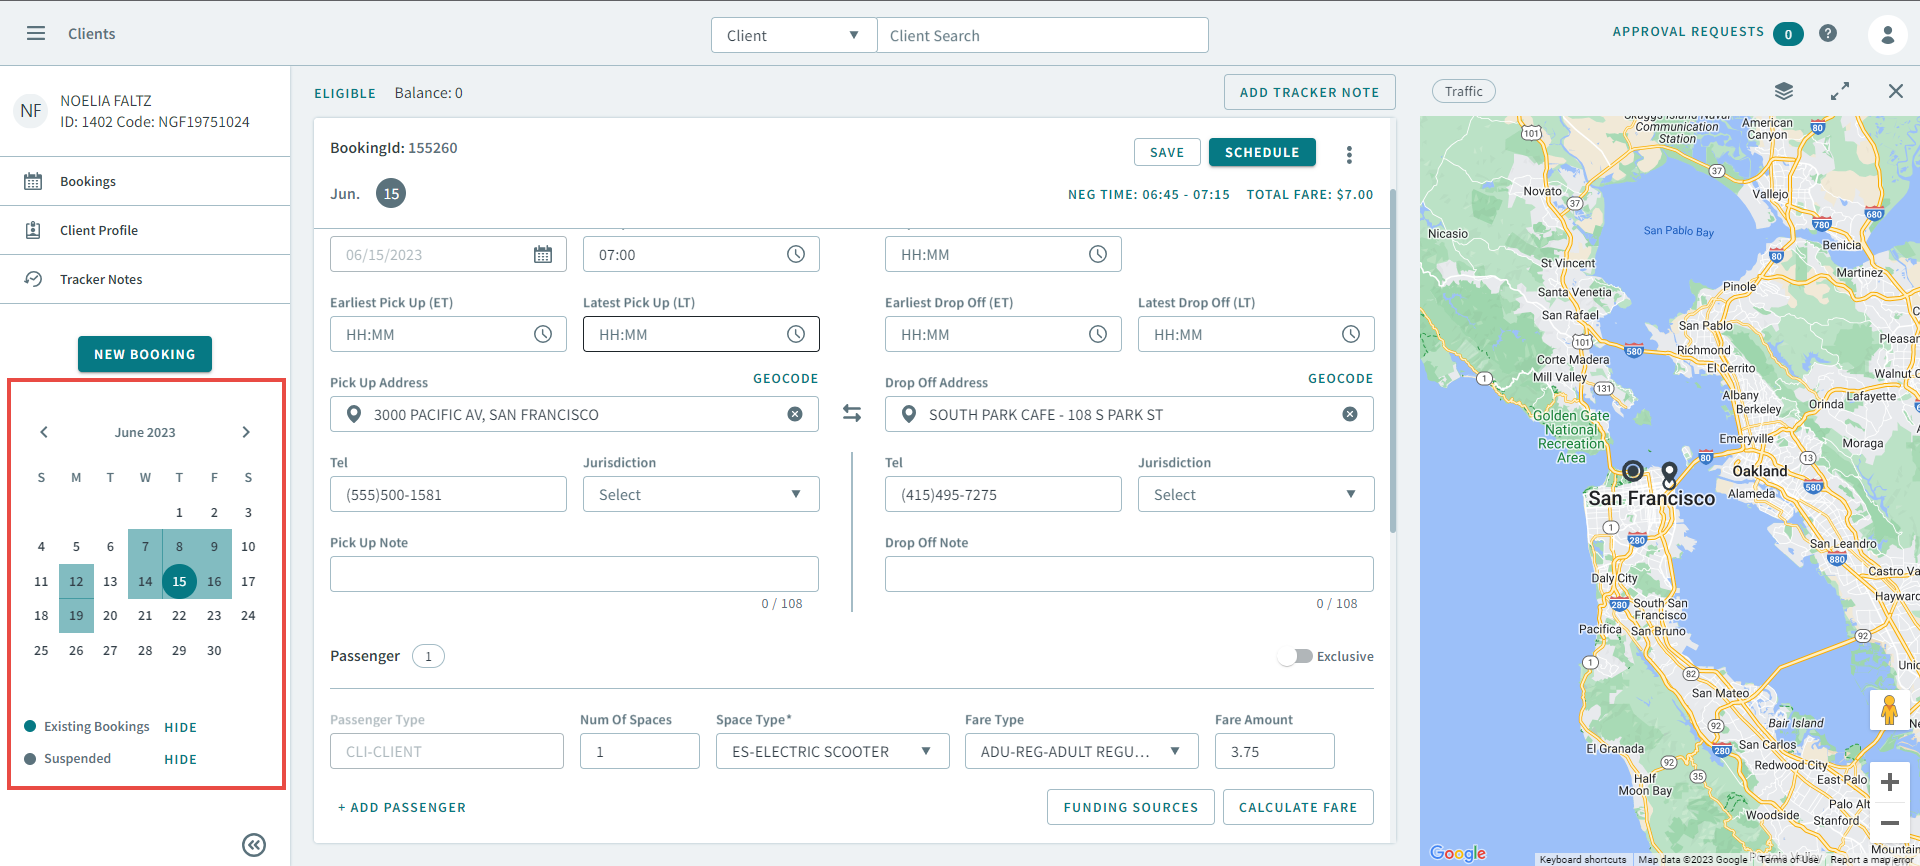
- Optional:
In the sidebar, you can select additional days for the booking by selecting the
dates in the calendar.
- Optional:
Click Advanced to expand the Date and
Time fields:
The ET and LT fields are displayed.
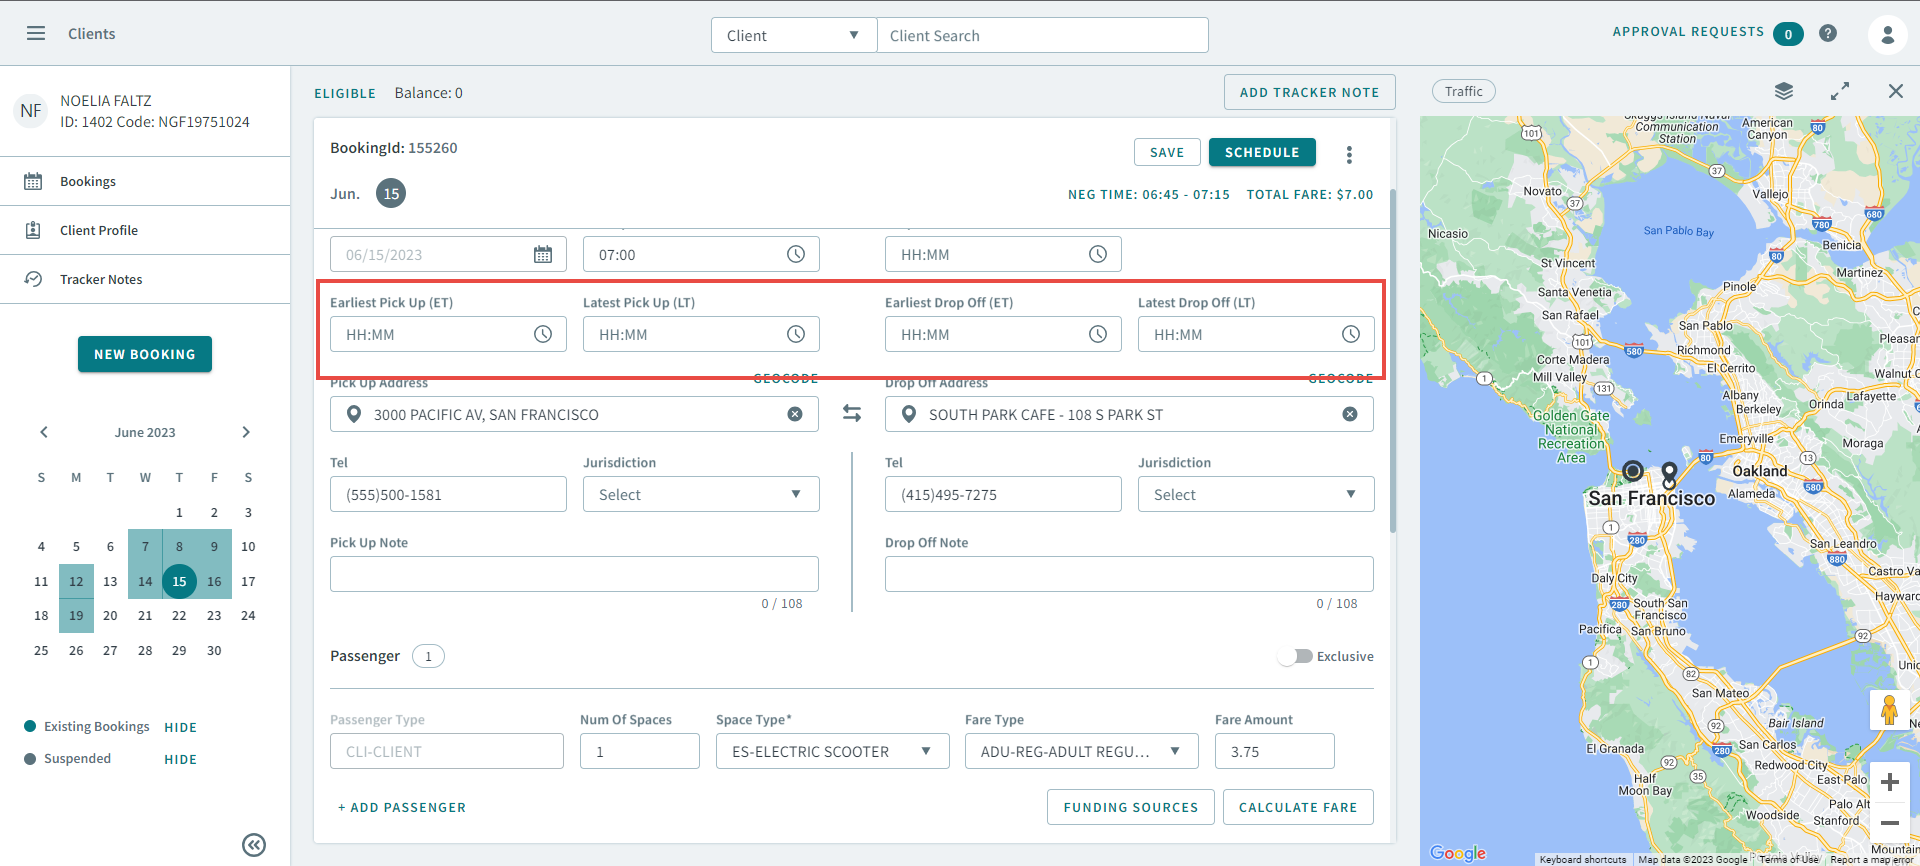
- Optional:
Enter a time in each of the following ET and LT fields:
- Earliest Pick Up (ET)
- Latest Pick Up (LT)
- Earliest Drop Off (ET)
- Latest Drop Off (LT)
Tip:Consider the following rules when configuring the ET and LT fields:- The time in Earliest Pick Up (ET) should be
before the times set in:
- Latest Pick Up (LT)
- Drop Off (if set)
- Earliest Drop Off (ET)
- Latest Drop Off (LT)
- The time in the Pick Up should be later than
the time in the Earliest Pick Up (ET), but
before the times set in:
- Latest Pick Up (LT)
- Earliest Drop Off (ET)
- Drop Off (if set)
- Latest Drop Off (LT)
- The time in the Latest Pick Up (LT) should be
before the times set in:
- Earliest Drop Off (ET)
- Drop Off (if set)
- Latest Drop Off (LT)
- The time in the Earliest Drop Off (ET) should
be before the times set in:
- Drop Off (if set),
- Latest Drop Off (LT)
- The time in the Drop Off should be equal to or earlier than the time in the Latest Drop Off (LT).
-
Enter addresses in Pick Up Address and
Drop Off Address.
Tip:Click on the search box to show frequently used and registered addresses.
- Optional:
Enter any additional information in Pick Up Note and
Drop Off Note.
Tip:This is what the driver will see when they perform the pick-up or drop-off.
- Optional:
Add passengers to the booking.
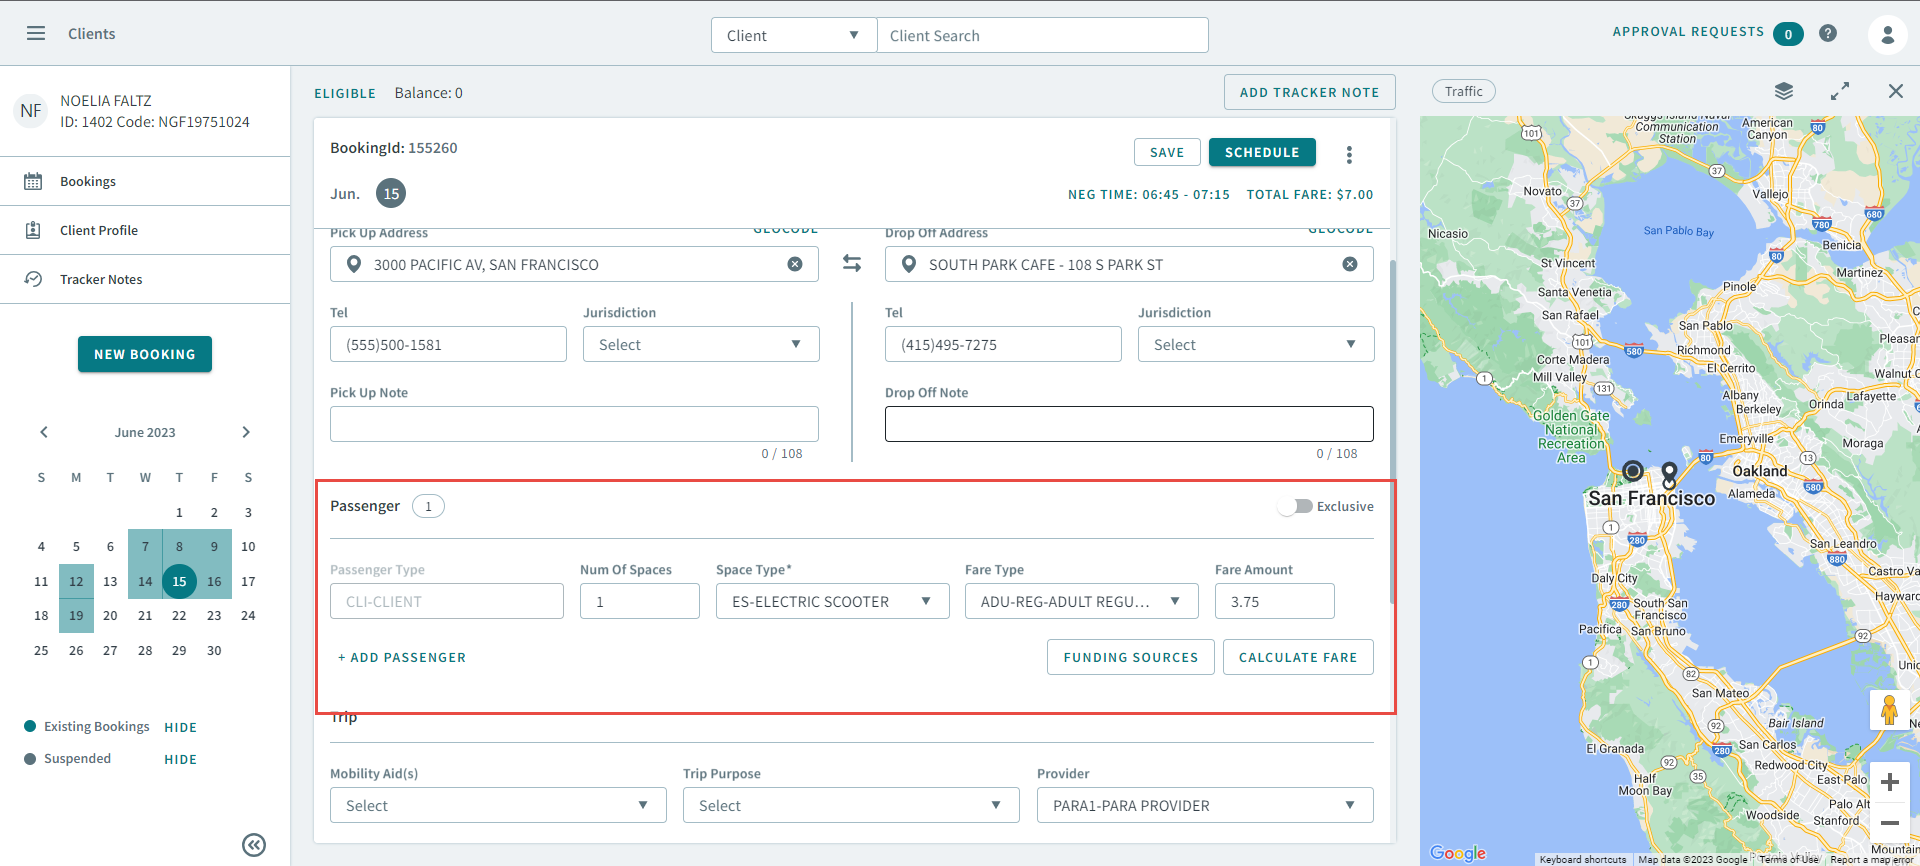
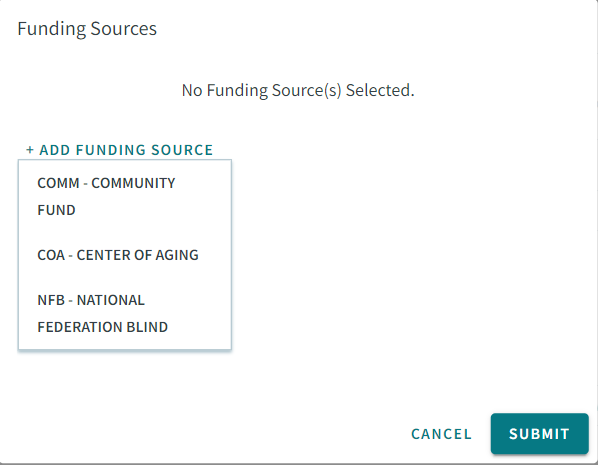
-
Click Funding Sources, and add a funding source
in the pop-up window.
-
Click Funding Sources, and add a funding source
in the pop-up window.
-
In the Trip section, complete the following fields to
provide additional information for the trip:
Note:If these were set in the client profile, they will automatically populate by default.
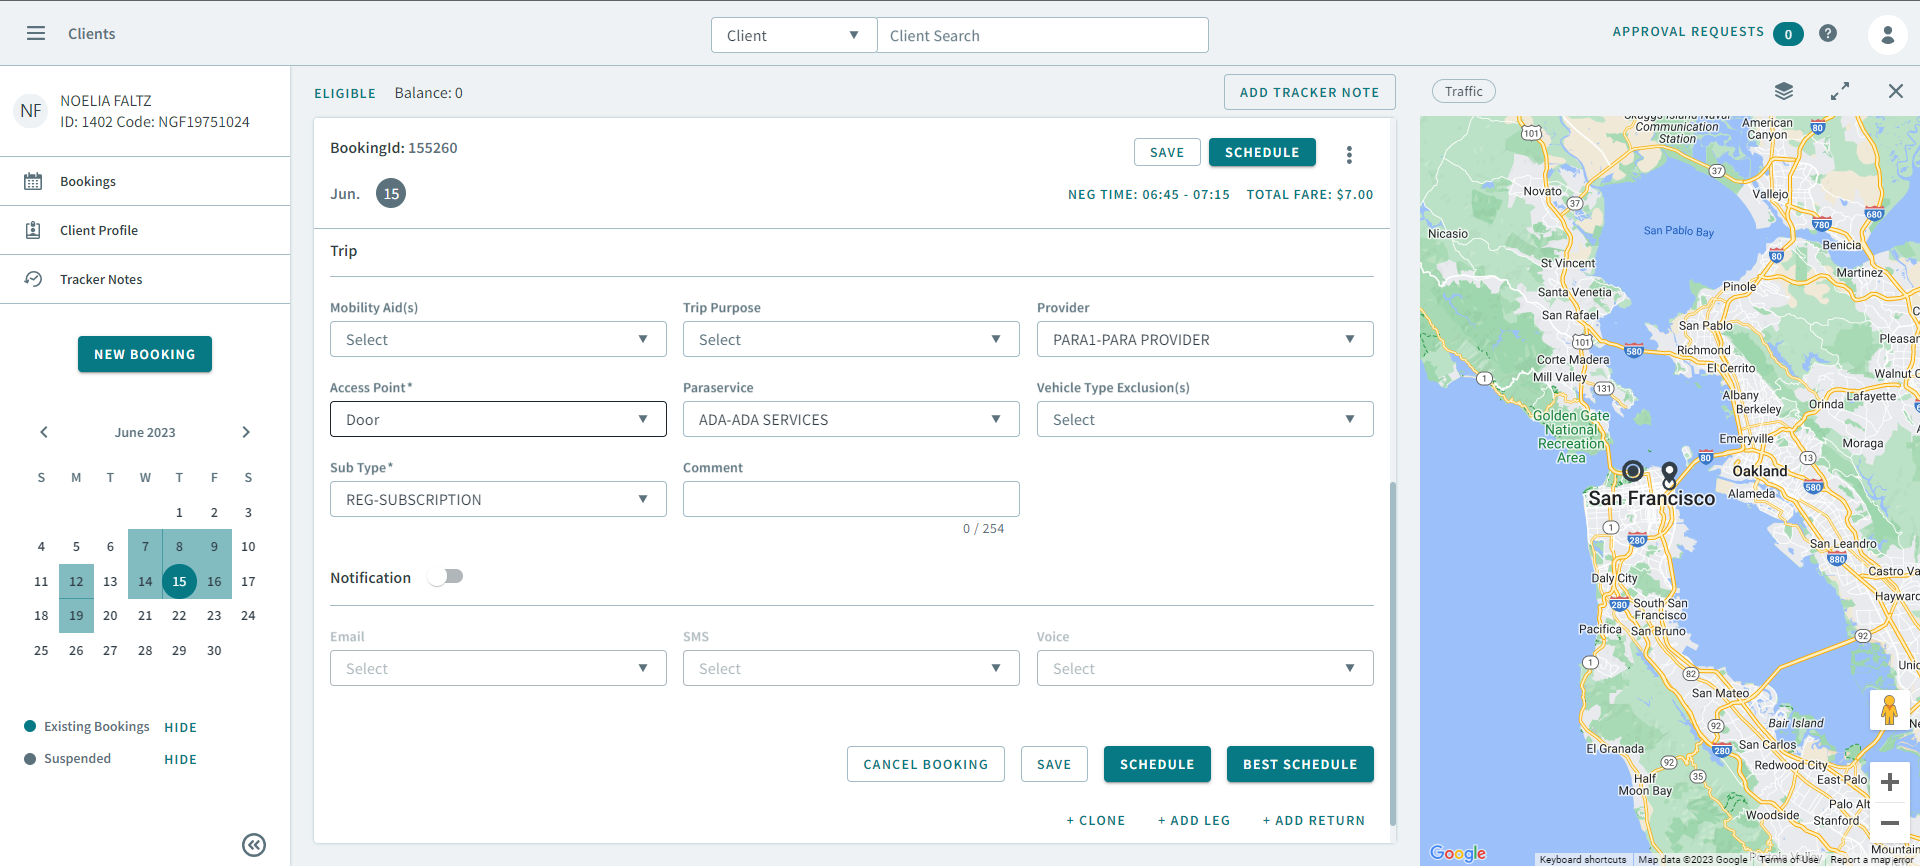
- Optional:
Turn the Notifications toggle on, select notifications
in the following dropdown lists:
- SMS
- Voice
Remember:Notifications must be setup in Trapeze4 and Trapeze6 for notification choices to appear. When enabled, the user will receive the selected notification type and through the format enabled for this particular trip. It is required that the site is using either TripSpark Notifications or PASS-IVR. - Optional:
Click Cancel Booking.
Tip:You can also cancel the booking by clicking
 in the top-right corner.
 - Click Save.
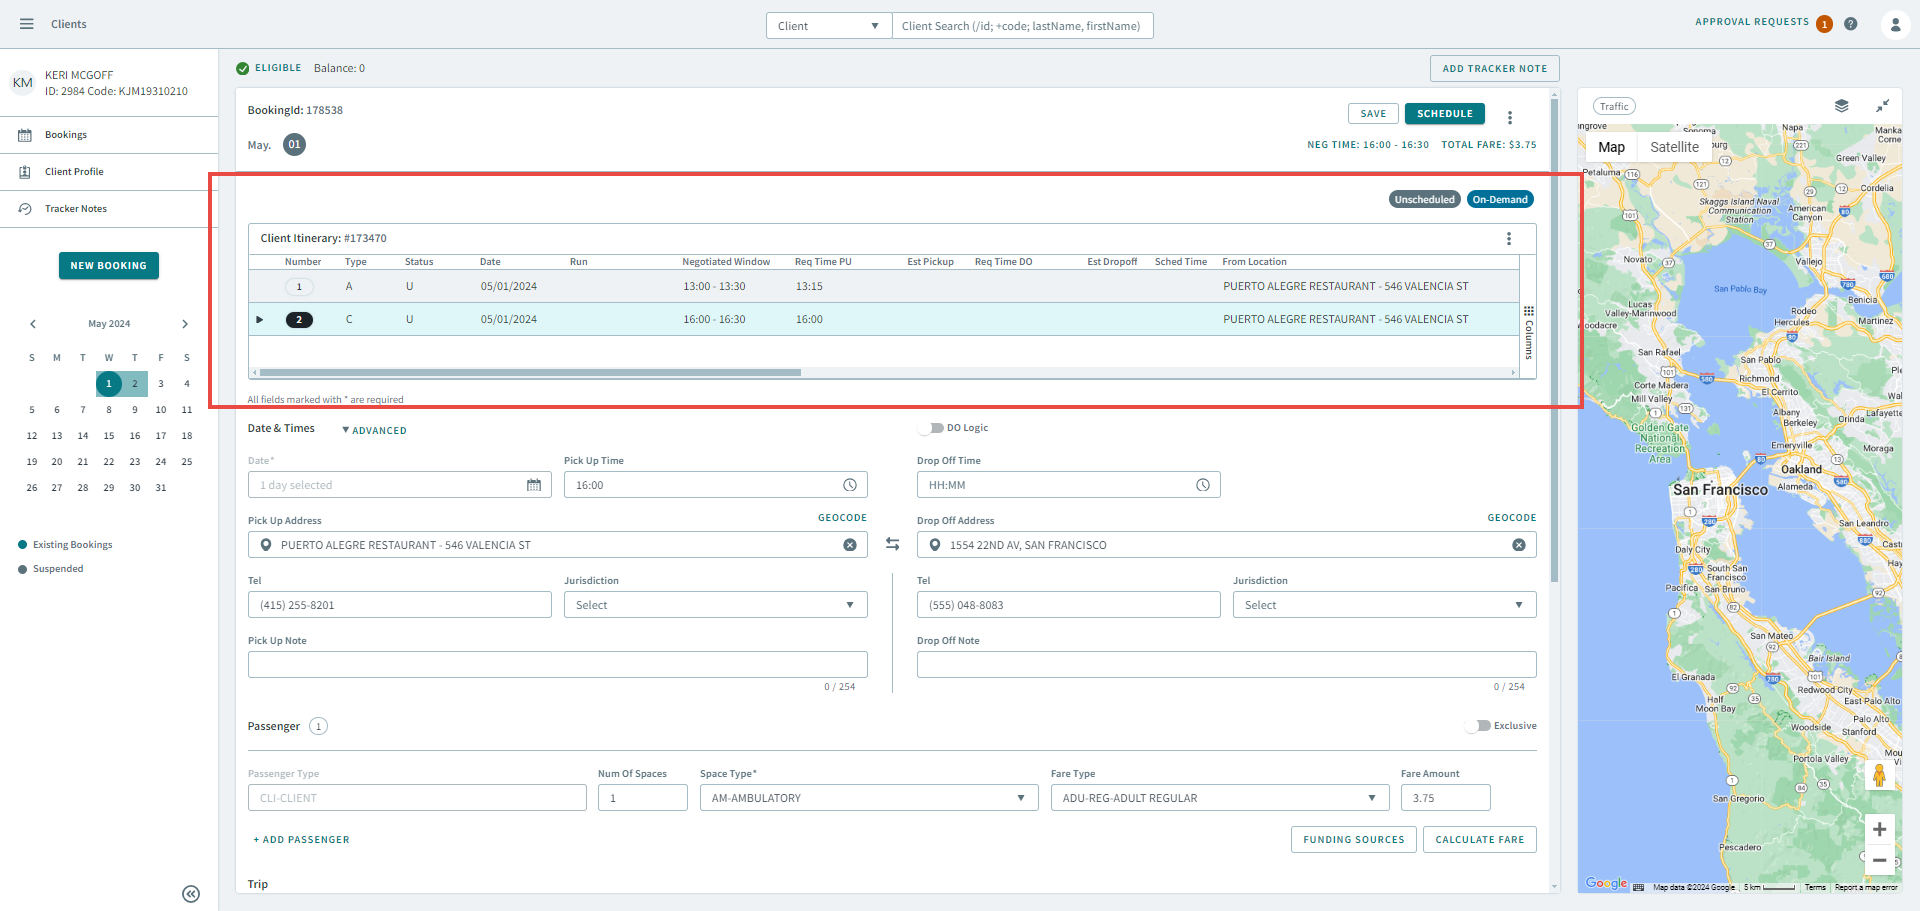
-
Click any of the following if you want to copy the booking details, or extend
the trip, for example, clicking Add Return, adds a return
trip to the booking, which makes it a full round trip.
- Clone
- Allows you to quickly create a new booking by copying the details of another booking.
- Clicking Clone will open a new booking with the same details, then modify the booking.
- Add Leg
- Clicking Add Leg will allow you add another destination to the trip.
- A new booking opens for the leg trip. You can add the pickup address, dropoff address and, pickup time details to fit it with the original booking.
- Click Save to link the trip with the original booking and display the Client Itinerary at the top of the booking.
- Add Return
- Clicking Add Return will make the booking a return trip by reversing the pick-up address and drop-off address.
- Click Save to link the trip with the original booking and display the Client Itinerary at the top of the booking.
- Clone
What to do next
- Click Schedule to open the booking in the Booking Wizard.
- To automatically schedule the booking, click Best Schedule. OneMobility will automatically schedule the booking with the best possible schedule.